Breeding and raising live mealworms is a simple process but it is a time consuming endeavour and requires regular attention and care. Raising mealworms to have a consistent supply year round saves a great deal of money versus purchasing multiple times per year from a local feed store or an online retailer. You are also more likely to have higher yield when the worms are home grown. Listed below are instructions on raising, breeding and maintaining a colony of mealworms. You can purchase a Mealworm Breeder Kit that includes everything you need to kickstart your colony. If all goes well, you should have mealworms to use as feeders within about 3 months.
WHAT YOU’LL NEED:
- 150+ Live Mealworms
- Breeder Box - approximately 14" x 8" x 5”
- Mealworm Keeper (or any meal bedding)
- Mealworm Chow and raw vegetables for a food source
- Thirsty Cricket (and/or raw vegetables to provide moisture)
STARTING YOUR COLONY:
-
Obtain an initial supply of live mealworms. You can start with as few as 150 but we recommend starting off with at least 500 at a time. Your initial supply will take a few months to begin producing a sufficient supply. If you need to use the mealworms to start feeding your animals right away, begin with even more. It takes a few months for the mealworms to reproduce, so this population will get depleted at first. The more mealworms you start with, the faster they’ll start breeding and you’ll have a new stock. Be cautious if purchasing "superworms" (Zophobas Morio) as they are sometimes treated with an insect growth hormone and may be be sterile.
-
Prepare your breeder box. You will need a large, shallow, smooth sided container that is about the size of a shoe box or larger. It is recommended to use a plastic or glass container rather than a wood or cardboard because mealworms can climb up or chew through wood. A clear container will let you see how much frass (waste) has accumulated. Mealworms thrive in a large container because providing more space will help dissipate heat and prevent overheating, which improves survival rate. Too many worms stored in too small a container will cause the worms to suffocate, get crushed, or simply overheat and die. The mealworms should be no more than 1 ½ “ deep. While mealworms (or darkling beetles) can’t fly, it is recommended to keep a tight fitting, removable lid or cover on the container to prevent infestation of mice, rats, cockroaches, spiders, flour and grain moths. If you are using a container that doesn’t come with a ventilated lid, drill holes in the plastic cover. If condensation forms on the inside of the lid, you need more holes. Good ventilation helps prevent mold growth.
-
Add bedding to the container. We recommend 2-3” of Mealworm Keeper. Otherwise, any form of a substrate with the word "meal" in it will be perfect for the worms (cornmeal, oatmeal, bran meal). The substrate should be ground to a fine powder to make it easier to pick out the worms and beetles when you need to move them. Place your initial supply of live mealworms in with the bedding. Finally, add about ½ cup of fresh vegetables- cut raw potatoes and carrots into 1x3” pieces and spread throughout the container for the mealworms. As long as the mealworms are >1" below the top of the container, they can't get out. Remove and replace any food every few days or when moldy. Proper ventilation and a fairly even temperature are essential to prevent mold growth. Some moisture is necessary and may be best provided with Thirsty Cricket (gel water source) or by the addition of some moist foods such as pieces of raw potatoes, carrots, ripe apples or banana peels. Add Thirsty Cricket to a low container (<1/2" tall, a jar lid will work just fine). Too little moisture slows growth and reduces size. Too much can produce mold.
-
Let them grow! After the container has been prepared and mealworms added, it should remain undisturbed for several weeks to allow the worms to develop. The mealworms (larvae) will begin eating the food and turn into pupae. The mealworms may pull the food under the bedding to eat it, which is completely normal. A close watch should be kept for several weeks until a number of adult beetles appear. The duration of the life cycle will depend on the temperature the mealworms are stored. For best results, keep the container around 80ºF and around 70% relative humidity. Mealworms do reproduce in temperatures ranging from 65-100ºF, but temperatures that range too high or too low can negatively impact growth and development. It may be best to keep the container in a heated laundry room, garage or basement. Room temperature is fine, but it may not maximize productivity. To increase temperatures above room temperature, you can use a Ceramic Heat Lamp, but this may cause the container to dry out and requires extra sources for moisture (Thirsty Cricket, raw vegetables or a moist sponge). Make sure to test the temperature with a thermometer and check it regularly during setup so that the mealworms don’t overheat. Keep the container out of direct sunlight.
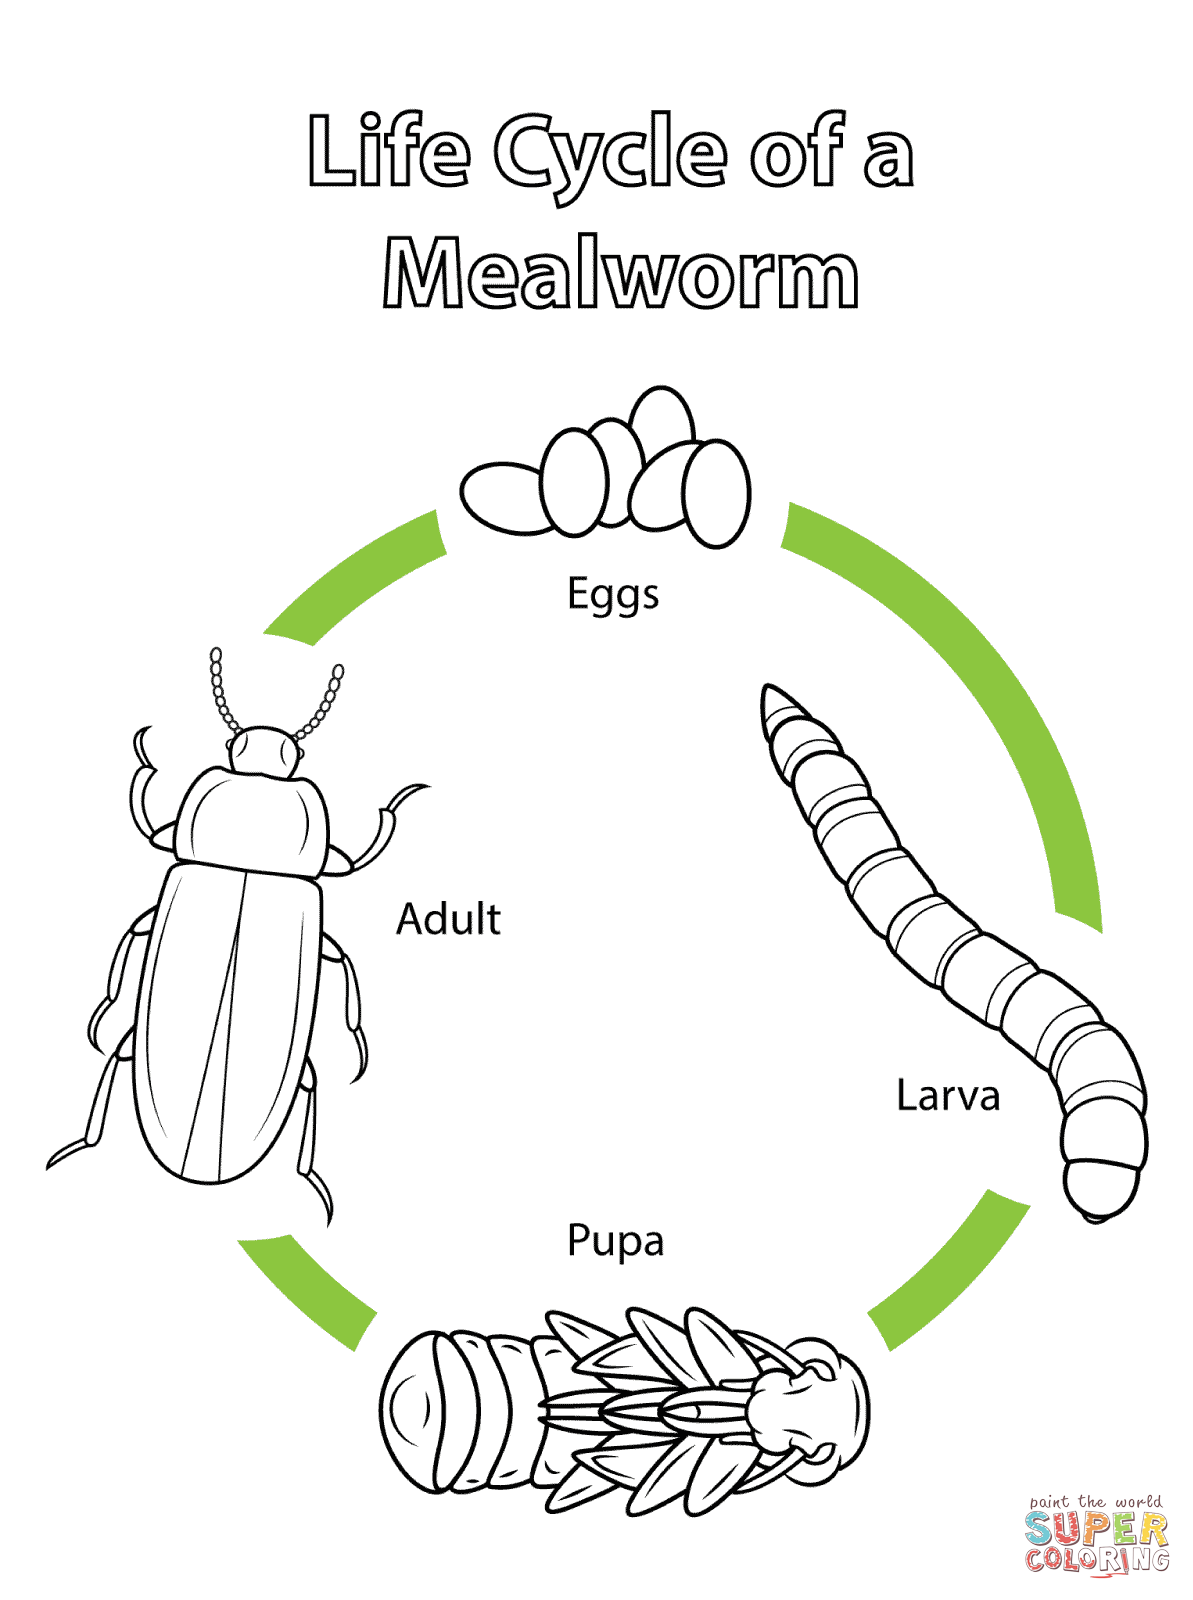
The life stages of the mealworm are displayed in the diagram below. Again, the duration of the life cycle will depend on the temperature the mealworms are stored. If all goes well, you should have mealworms to use as feeders within about 3 months. The mealworm will stay in the larvae stage for about 4-6 weeks. The duration of the pupa stage usually lasts around 1-3 weeks. Once the pupa turns into an adult beetle it will reproduce and lay eggs until the life cycle ends and the beetle dies. You will need to separate any eggs or larvae from the beetles. If you fail to separate them, the beetles will eat them. Dead mealworms and beetles should be removed from the container and discarded. Continuing reading below for steps on maintaining your colony after eggs are laid.
MAINTAINING YOUR COLONY:
-
The mealworms, which are the larvae of the darkling beetle, will need 3 months or more to go through their life cycle and reproduce to make new mealworms. They will change from larvae (mealworm) to pupae, then from pupae to mature beetles. The beetles will copulate and lay eggs in the substrate, which hatch 1 to 4 weeks later. While you wait for this process to take place, check the bin every day and take care of the mealworms by regulating the temperature, removing and discarding any dead mealworms or beetles and changing out the food.
-
Getting a second container is essential a few weeks into the process. Once the new larvae (mealworms) hatch from their eggs, you'll need to move all the beetles to the second container. If you fail to separate them, the beetles will feed on them. When you move the beetles to the second container, they will lay more eggs and continue the reproduction process. Prepare the second container the same way as you did for the first. Add 2-3” of Mealworm Keeper or any form of a substrate to the container. Pick out the beetles from your initial colony and place them into the new second container. The beetles won't bite and rarely fly. Finally, add about ½ cup of fresh vegetables- cut raw potatoes and carrots into 1x3” pieces and spread throughout the container. By using a two tray system, you should be able to provide a continuous supply of worms. Tip for separating beetles: you can catch live beetles by providing apple slices. The beetles will swarm to the apple - then just lift it and shake them off into the new container, swarm after swarm.
- Once the new larvae (mealworms) are big enough, you may feed them to your pets. You can store mealworms in the refrigerator (4-8 weeks) to make them keep longer if you want to set some aside for feeding later on. Remember that any mealworms left in the container will mature and become pupae, then beetles. Continue moving beetles to the second container as they mature.
-
Once the life cycle has completed in the first bin, the bedding substrate will be depleted and become foul. The eggs will have hatched into larvae (mealworms) and you will need to pick them out in order to disinfect the first container. The bedding must be discarded, the container emptied and cleaned, and a fresh supply of vegetables made available for the worms. When it comes time to clean the second container, you may have to sift out the bean-shaped white eggs from the bedding before cleaning.
CONTINUED DETAILS ON THE LIFE CYCLE CHANGES: The life cycle of a darkling beetle starts with an egg. The egg hatches into larva, commonly known as a mealworm. Larvae burrow below the surface of the grain and undergo a series of molts, shedding their exoskeleton. The last molt occurs about three months after the egg stage. Newly molted larva are white, and the exoskeleton has not hardened so they may be more digestible. The fully grown larvae (mealworms) are golden brown and a little over one inch long. The larvae come to the surface of the substrate, turn soft and plump, and then transform into naked white pupae that turns yellowish brown. The pupae don't eat or move much. After about 1-3 weeks the pupae metamorphose into beetles. At first the beetle is white/light beige with a soft shell, and then it darkens and hardens to red, brown, and finally turns dark brown/black after about 2-7 days. The beetle is about a half to three quarters of an inch long and slightly flat. This beetle will reproduce for a few months before dying, where the life cycles ends.
Supplements: You can add supplements to make your mealworms fatter and healthier before feeding. Sprinkle supplements into the bedding or directly on the fruit used in the breeding container. Example of supplements are ZooPro High Protein Supplement, calcium supplement (or finely ground egg shells), wheat germ, soybean meal, fish flakes, fine mouse cubes, bone meal, graham (whole wheat) flour, and dry brewer's yeast (provides proteins).
Mites: Sometimes a mealworm colony gets infested by grain mites (Acarus siro). The mites are tiny and round, whitish or tan in color, and have eight legs. They may cling to air holes and look like very fine sawdust but they can not fly. The mites may come from the mealworm supplier, in bran bedding and may infest a colony that has been around for a long period of time. Excessive moisture may also be a contributor. Mites are prolific breeders (800 eggs/female) and can withstand temperatures of 0 degrees and still hatch when brought to room temperature. Once they infect a colony you must trash it and start over. To prevent mite infestation use only Exotic Nutrition Mealworm Keeper. Since mites can’t fly, the only way to infiltrate a breeding container is to crawl inside. By floating the mealworm container in water (to create a moat), you prevent mite infestation. You can also stand the container up on legs, each of which sits in a small container of water. Use Vaseline to line the container with a 2" wide band on the outside just after you wash and dry it to prevent mites from getting into a worm bed.
__________________________________________________________________________________________________________
Looking for more information? Browse our archive of articles:
More Questions? Our customer service representatives are happy to address your questions or provide additional information about products. Please Contact Us.
Please Note: Exotic Nutrition is not in a position to provide specific health and care guidelines on an individual basis. Please visit our animal info tabs or consider purchasing a care guide book for additional information. If you have a health or pet emergency issue, please notify your veterinarian or a specialized technician.
Leave a Comment